How-To Go Live on Facebook from Mobile Phone
- Begin by downloading and opening the Pages app on your phone.
- Head over to the business page that you would like to go Live from. If you are an admin of multiple pages you will be able to select the page. Once you are on the correct page, scroll down until you see the “Publish” (iPhone) or “Post” (android) button.
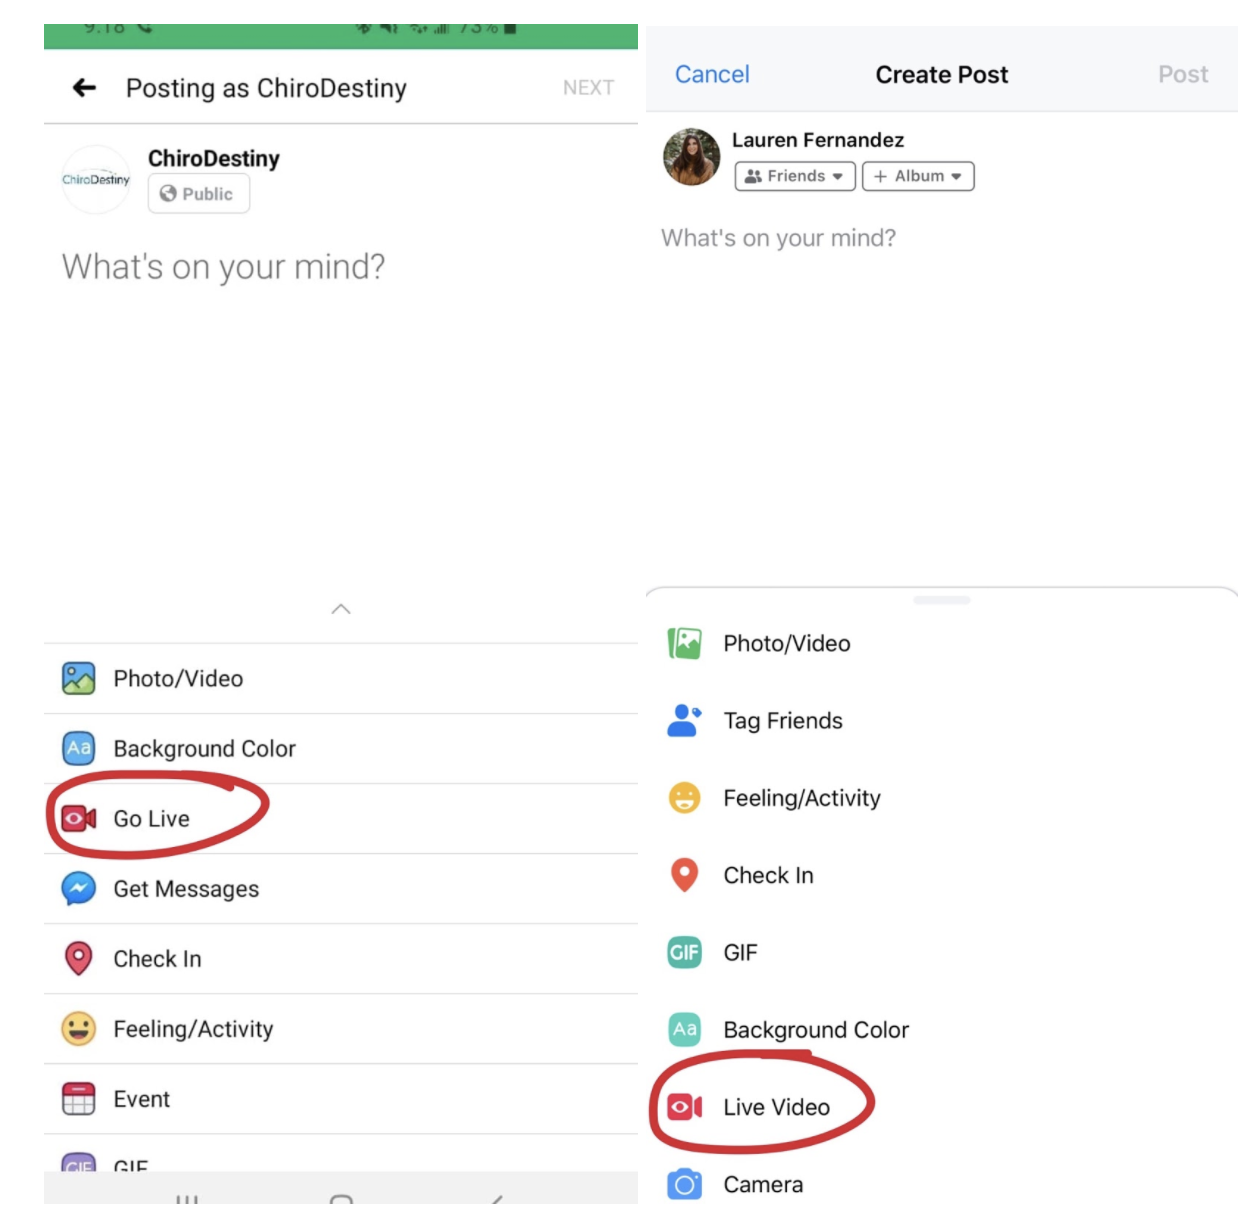
3. Once you click the “Publish” (iPhone) or “Post” (android) button you will see “Go Live” (if you are on an Android phone). If you are on an iPhone, click “Add to your post” and select “Go Live” from there.
4. Once you click ‘Live’ it’ll take you to the screen shown below to the left of your phone screen. Click ‘OK’ and continue.
- We recommend writing a title & description for your post prior to going live so that more people are inclined to click through to watch it
How-To Go Live on Facebook from Mobile Phone
- Begin by downloading and opening the Pages app on your phone.
- Head over to the business page that you would like to go Live from. If you are an admin of multiple pages you will be able to select the page. Once you are on the correct page, scroll down until you see the “Publish” (iPhone) or “Post” (android) button.
3. Once you click the “Publish” (iPhone) or “Post” (android) button you will see “Go Live” (if you are on an Android phone). If you are on an iPhone, click “Add to your post” and select “Go Live” from there.
4. Once you click ‘Live’ it’ll take you to the screen shown below to the left of your phone screen. Click ‘OK’ and continue.
- We recommend writing a title & description for your post prior to going live so that more people are inclined to click through to watch it
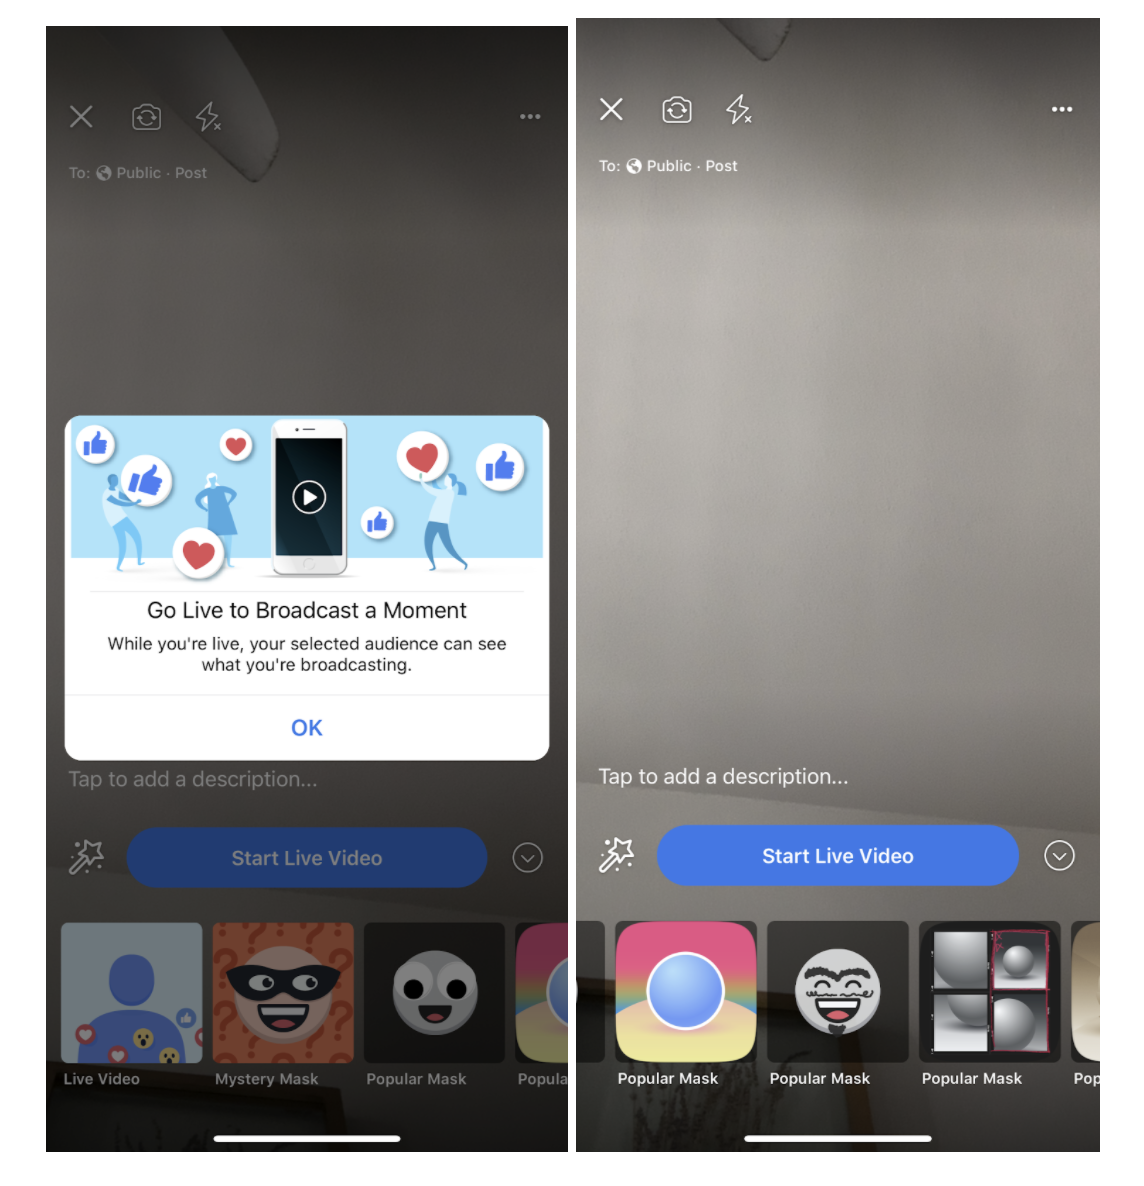
5. Once you click ‘OK’ the screen will appear as it does in the above right image. On the bottom of your screen, you’ll see filters that can be used during the Live video. Scroll to the left to see more filter options. You can also add a description of your video for your audience to see!
6. When you are done setting up the above steps, you are now ready to go live! Just click ‘Start Live Video’.
*Bonus Tips:
- To have more control of your Live settings, tap the 3 dots in the upper right-hand corner of the Go Live screen. This will take you to ‘Audience Restrictions’ and will allow you to choose who can participate/the location of your Live Video.
- In the ‘Audience Restrictions’ menu, you’ll have the option of choosing a location, Geo Controls, and more. Preview the picture below.
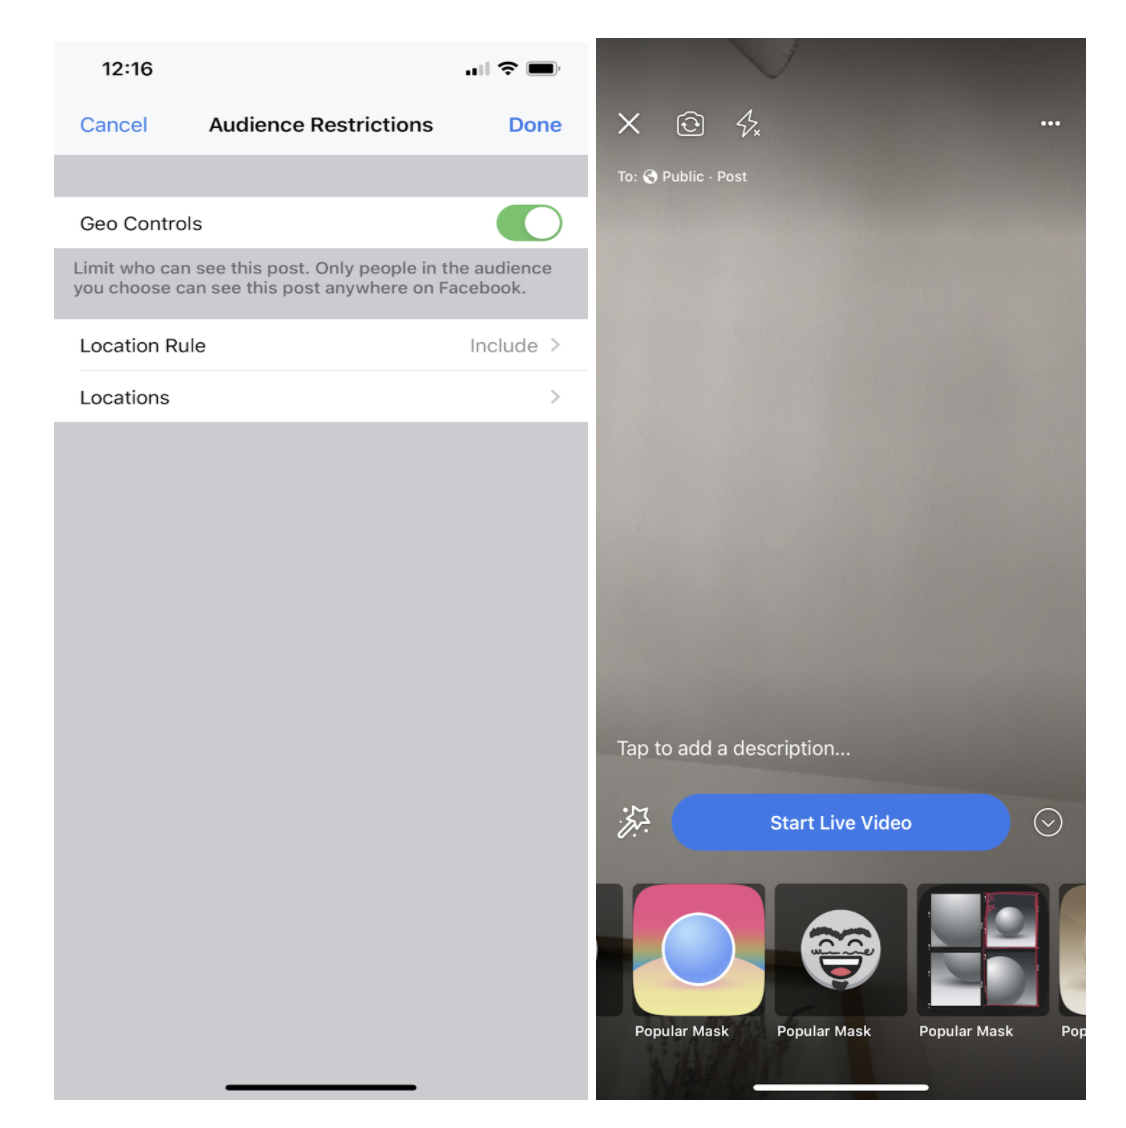
3. Click ‘Done’ when finished setting up your Audience Restrictions.
How-To Go Live on Facebook Live from your Desktop
- Go to the Facebook website on your computer and head over to your main profile page.
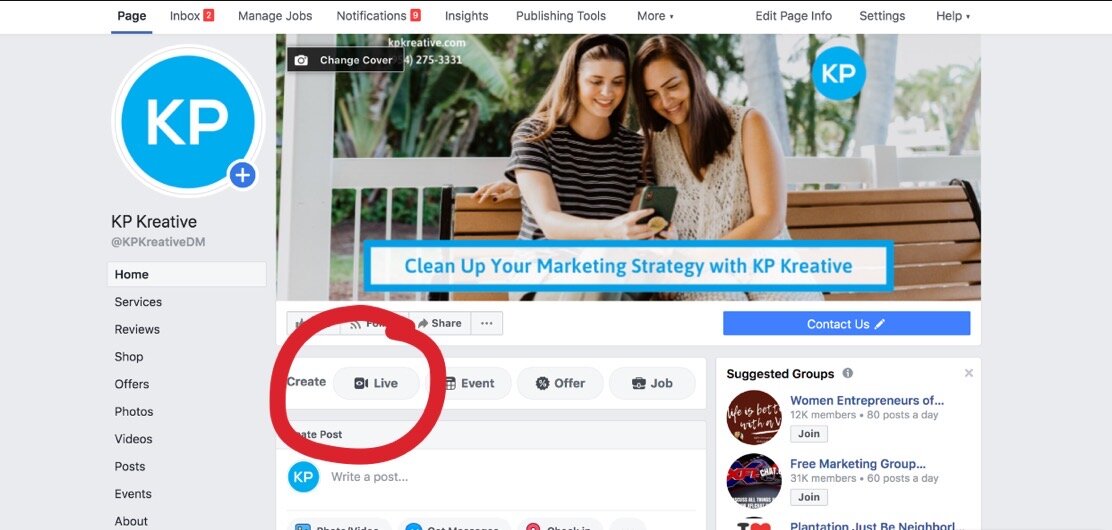
2. On your Business Page, you’ll see a button next to Create titled ‘Live’. Click the ‘Live’ button.
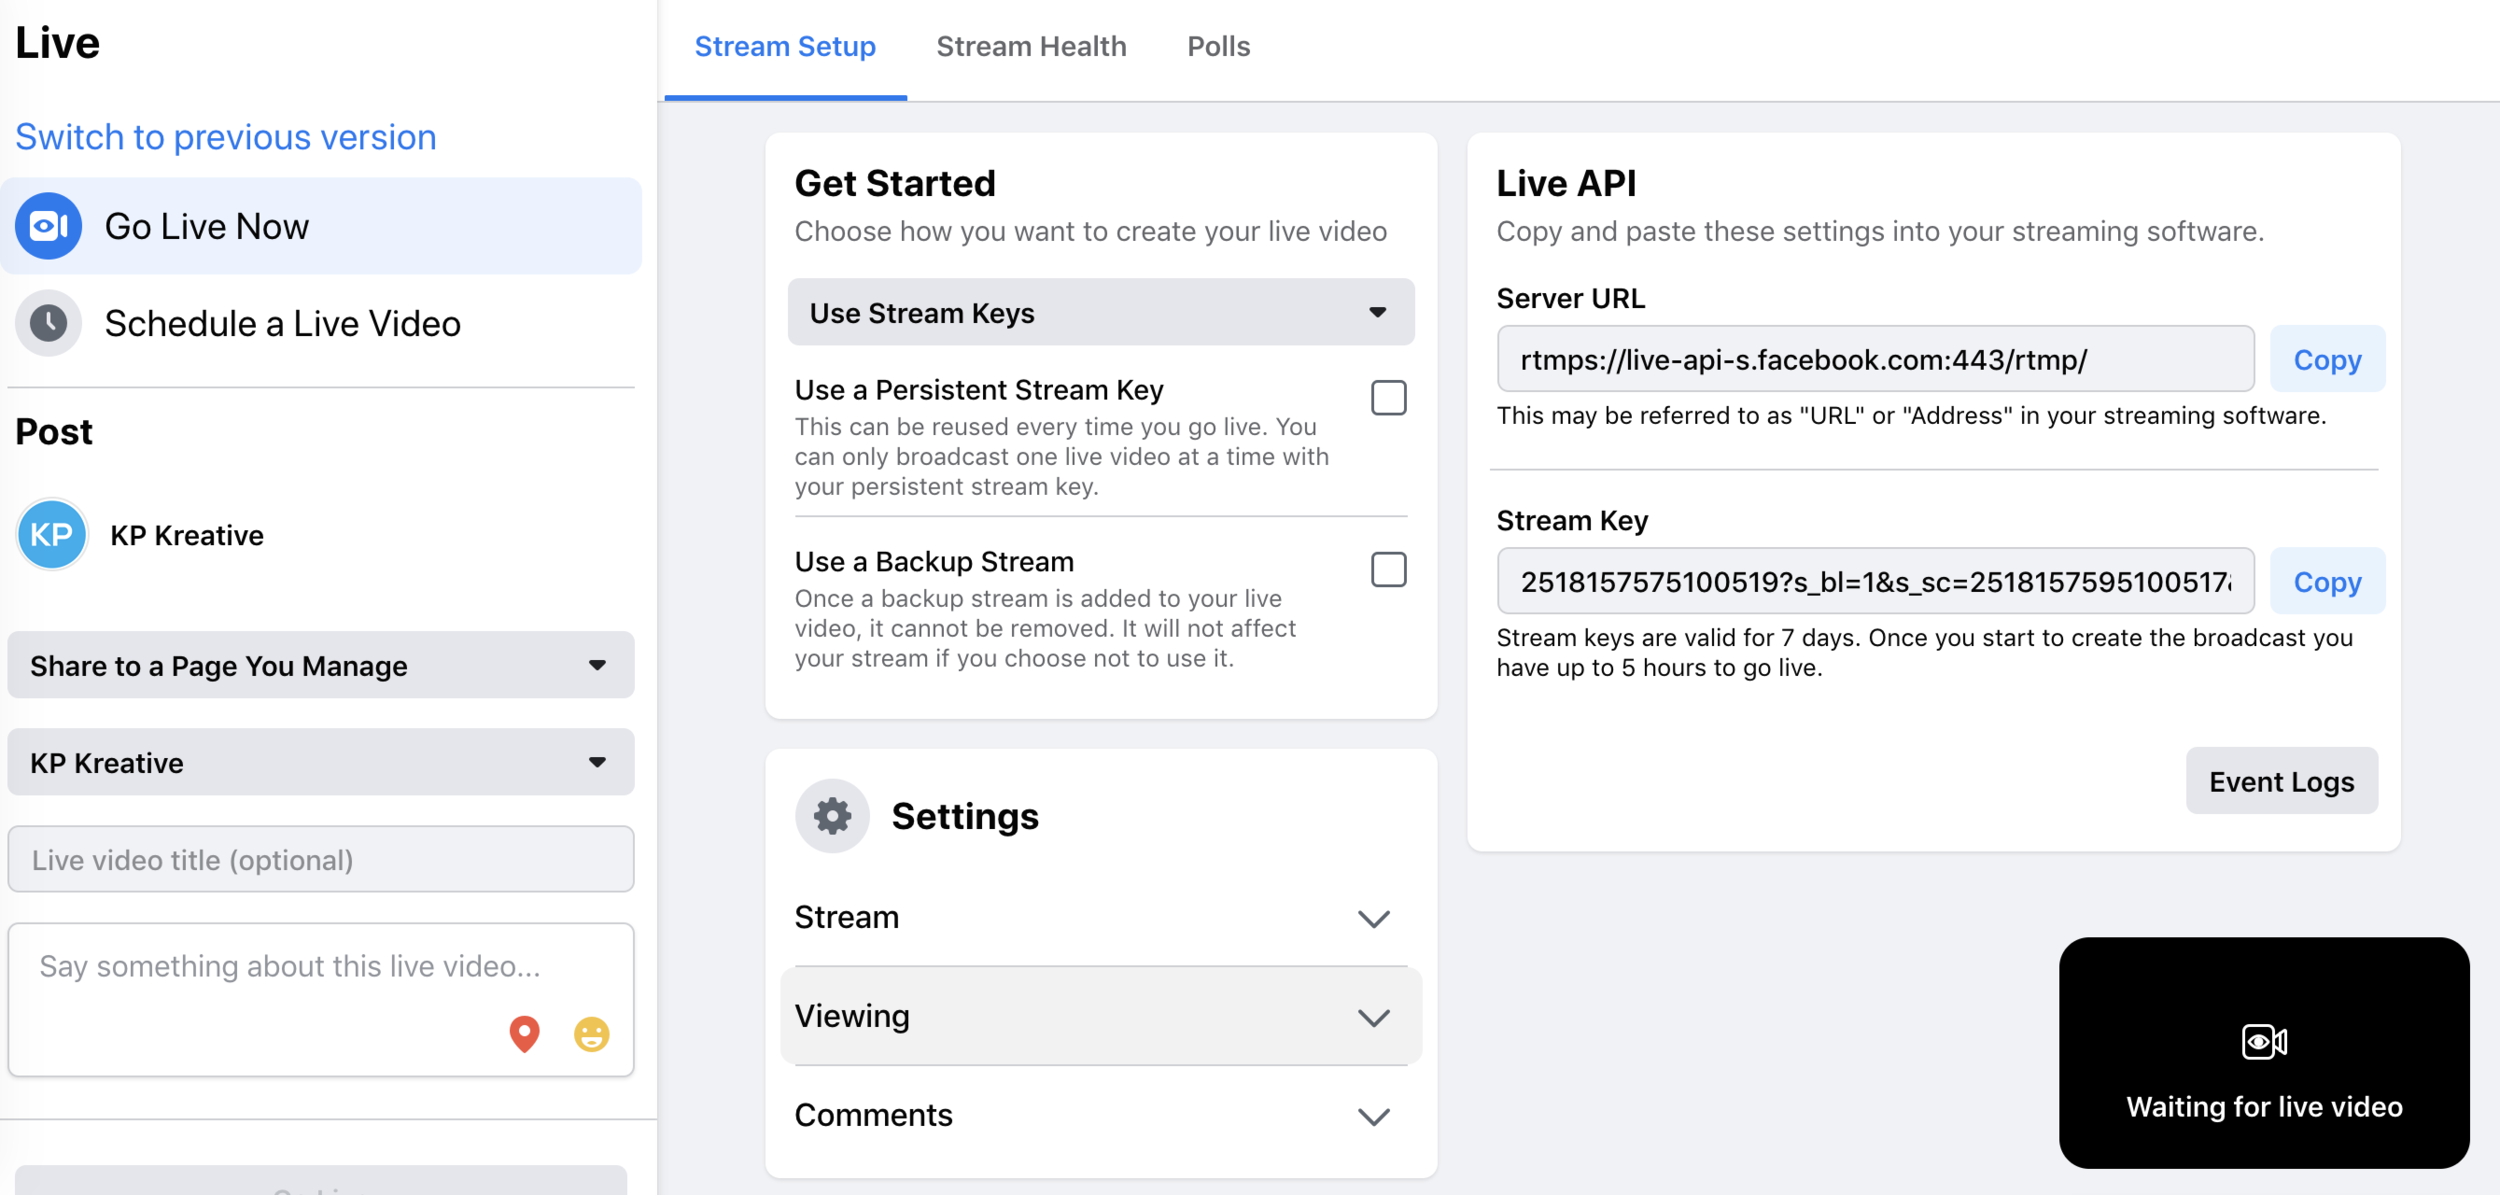
3. The page above will appear on your screen. Head over to the top left corner of your screen and click ‘Go Live Now’.
*Bonus Tips
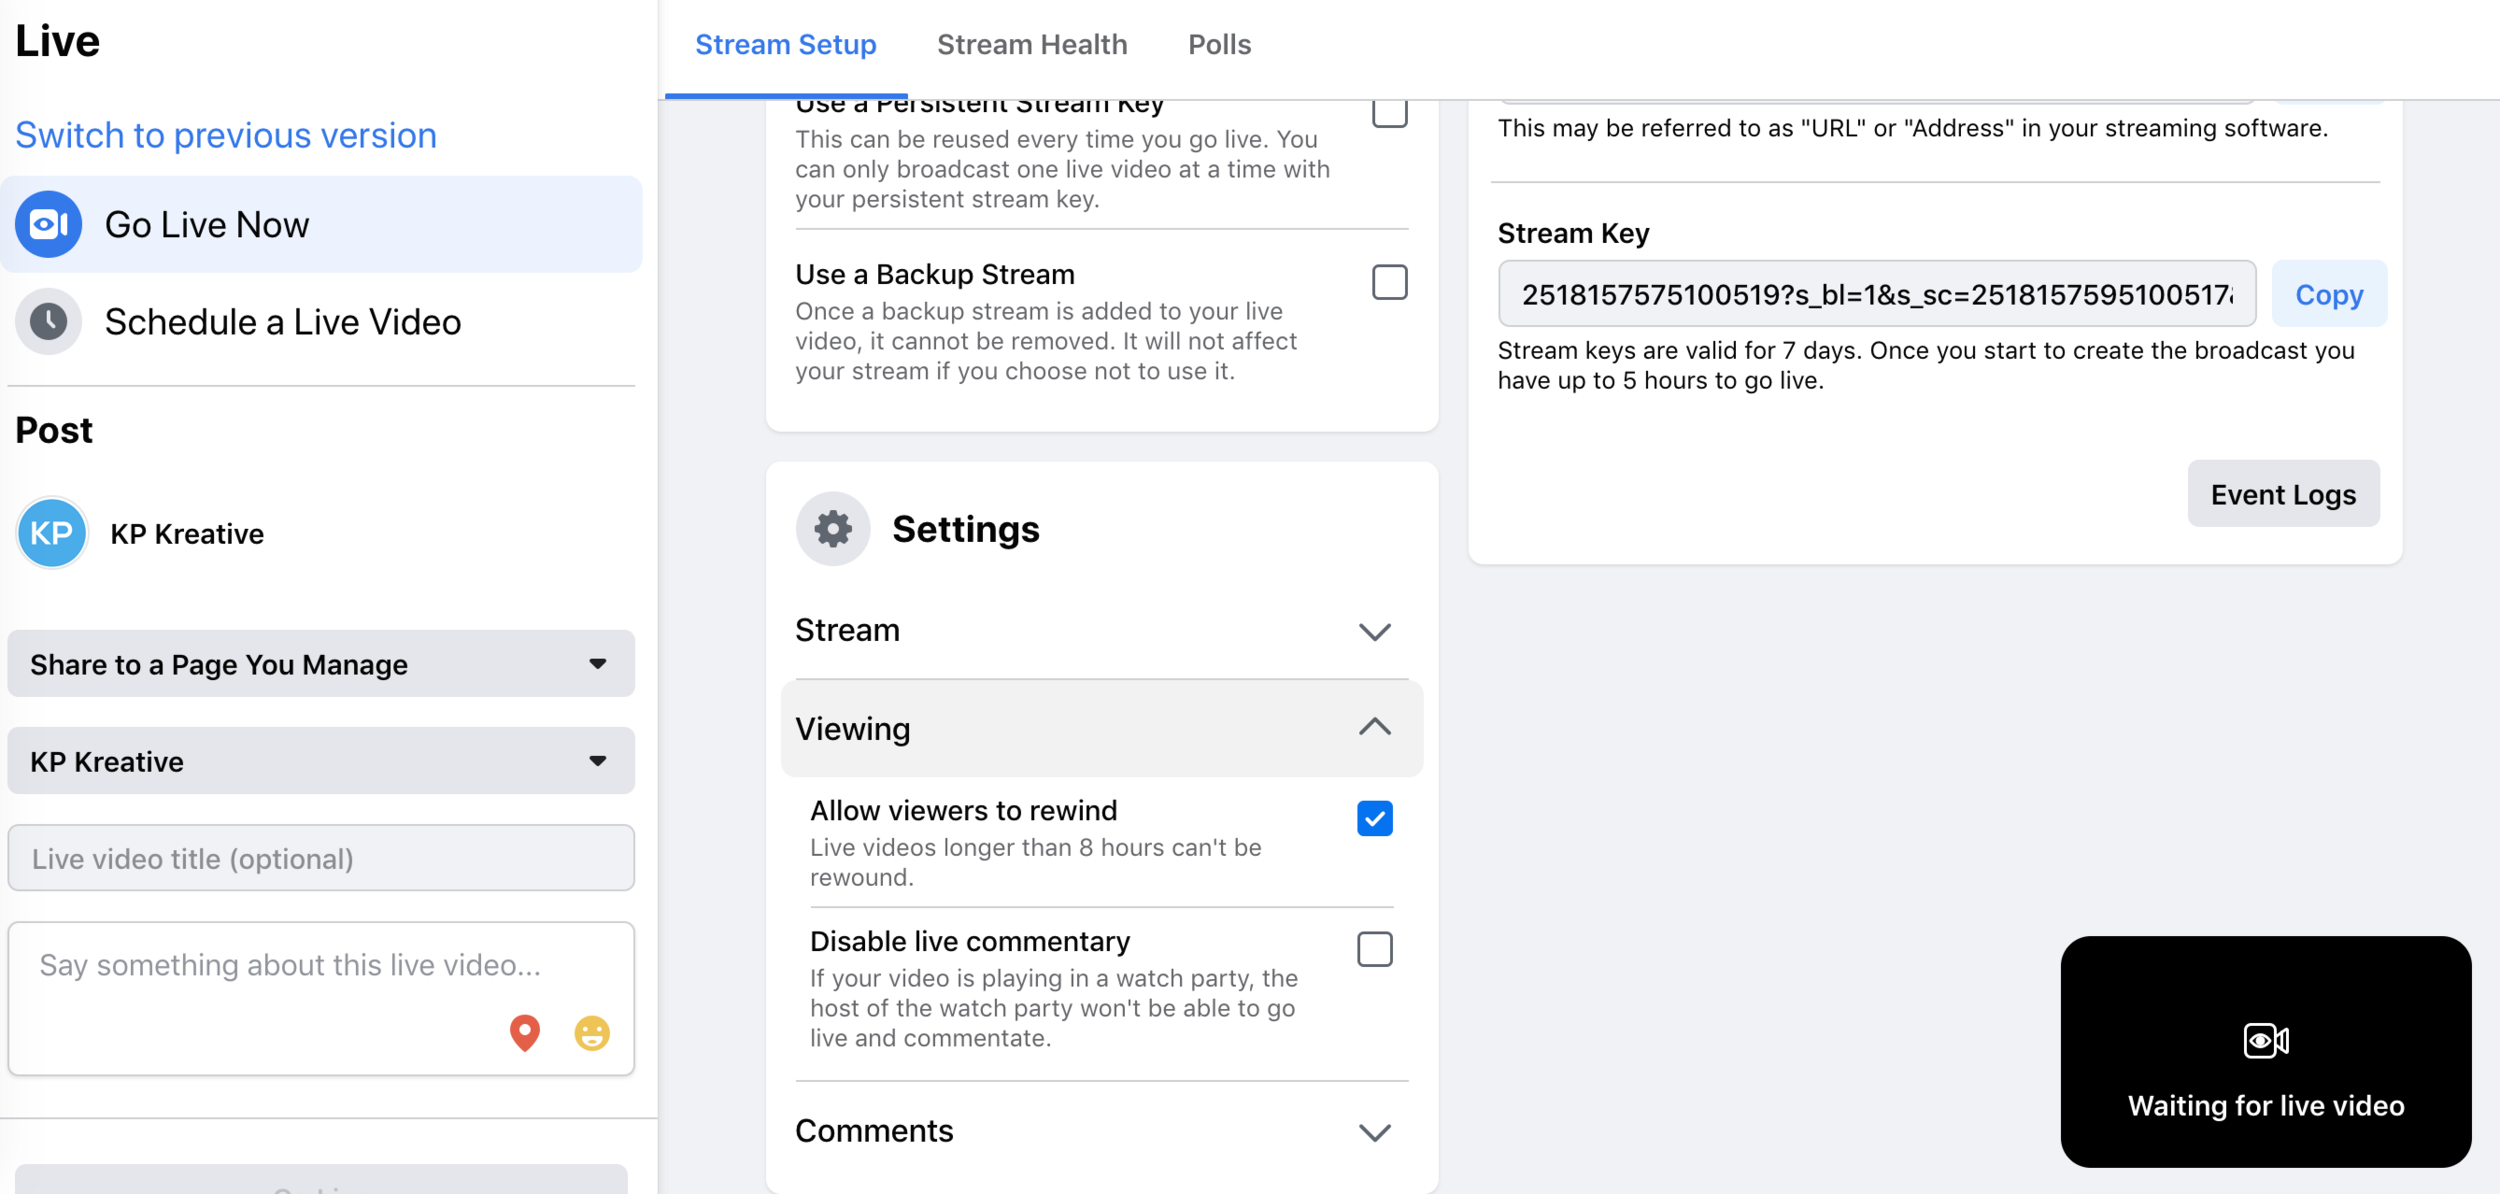
- Before you begin your Live, you can configure your settings. Head over to the Settings menu and click the drop-down arrow for ‘Viewing’. This allows you to customize your live commentary and audience features.
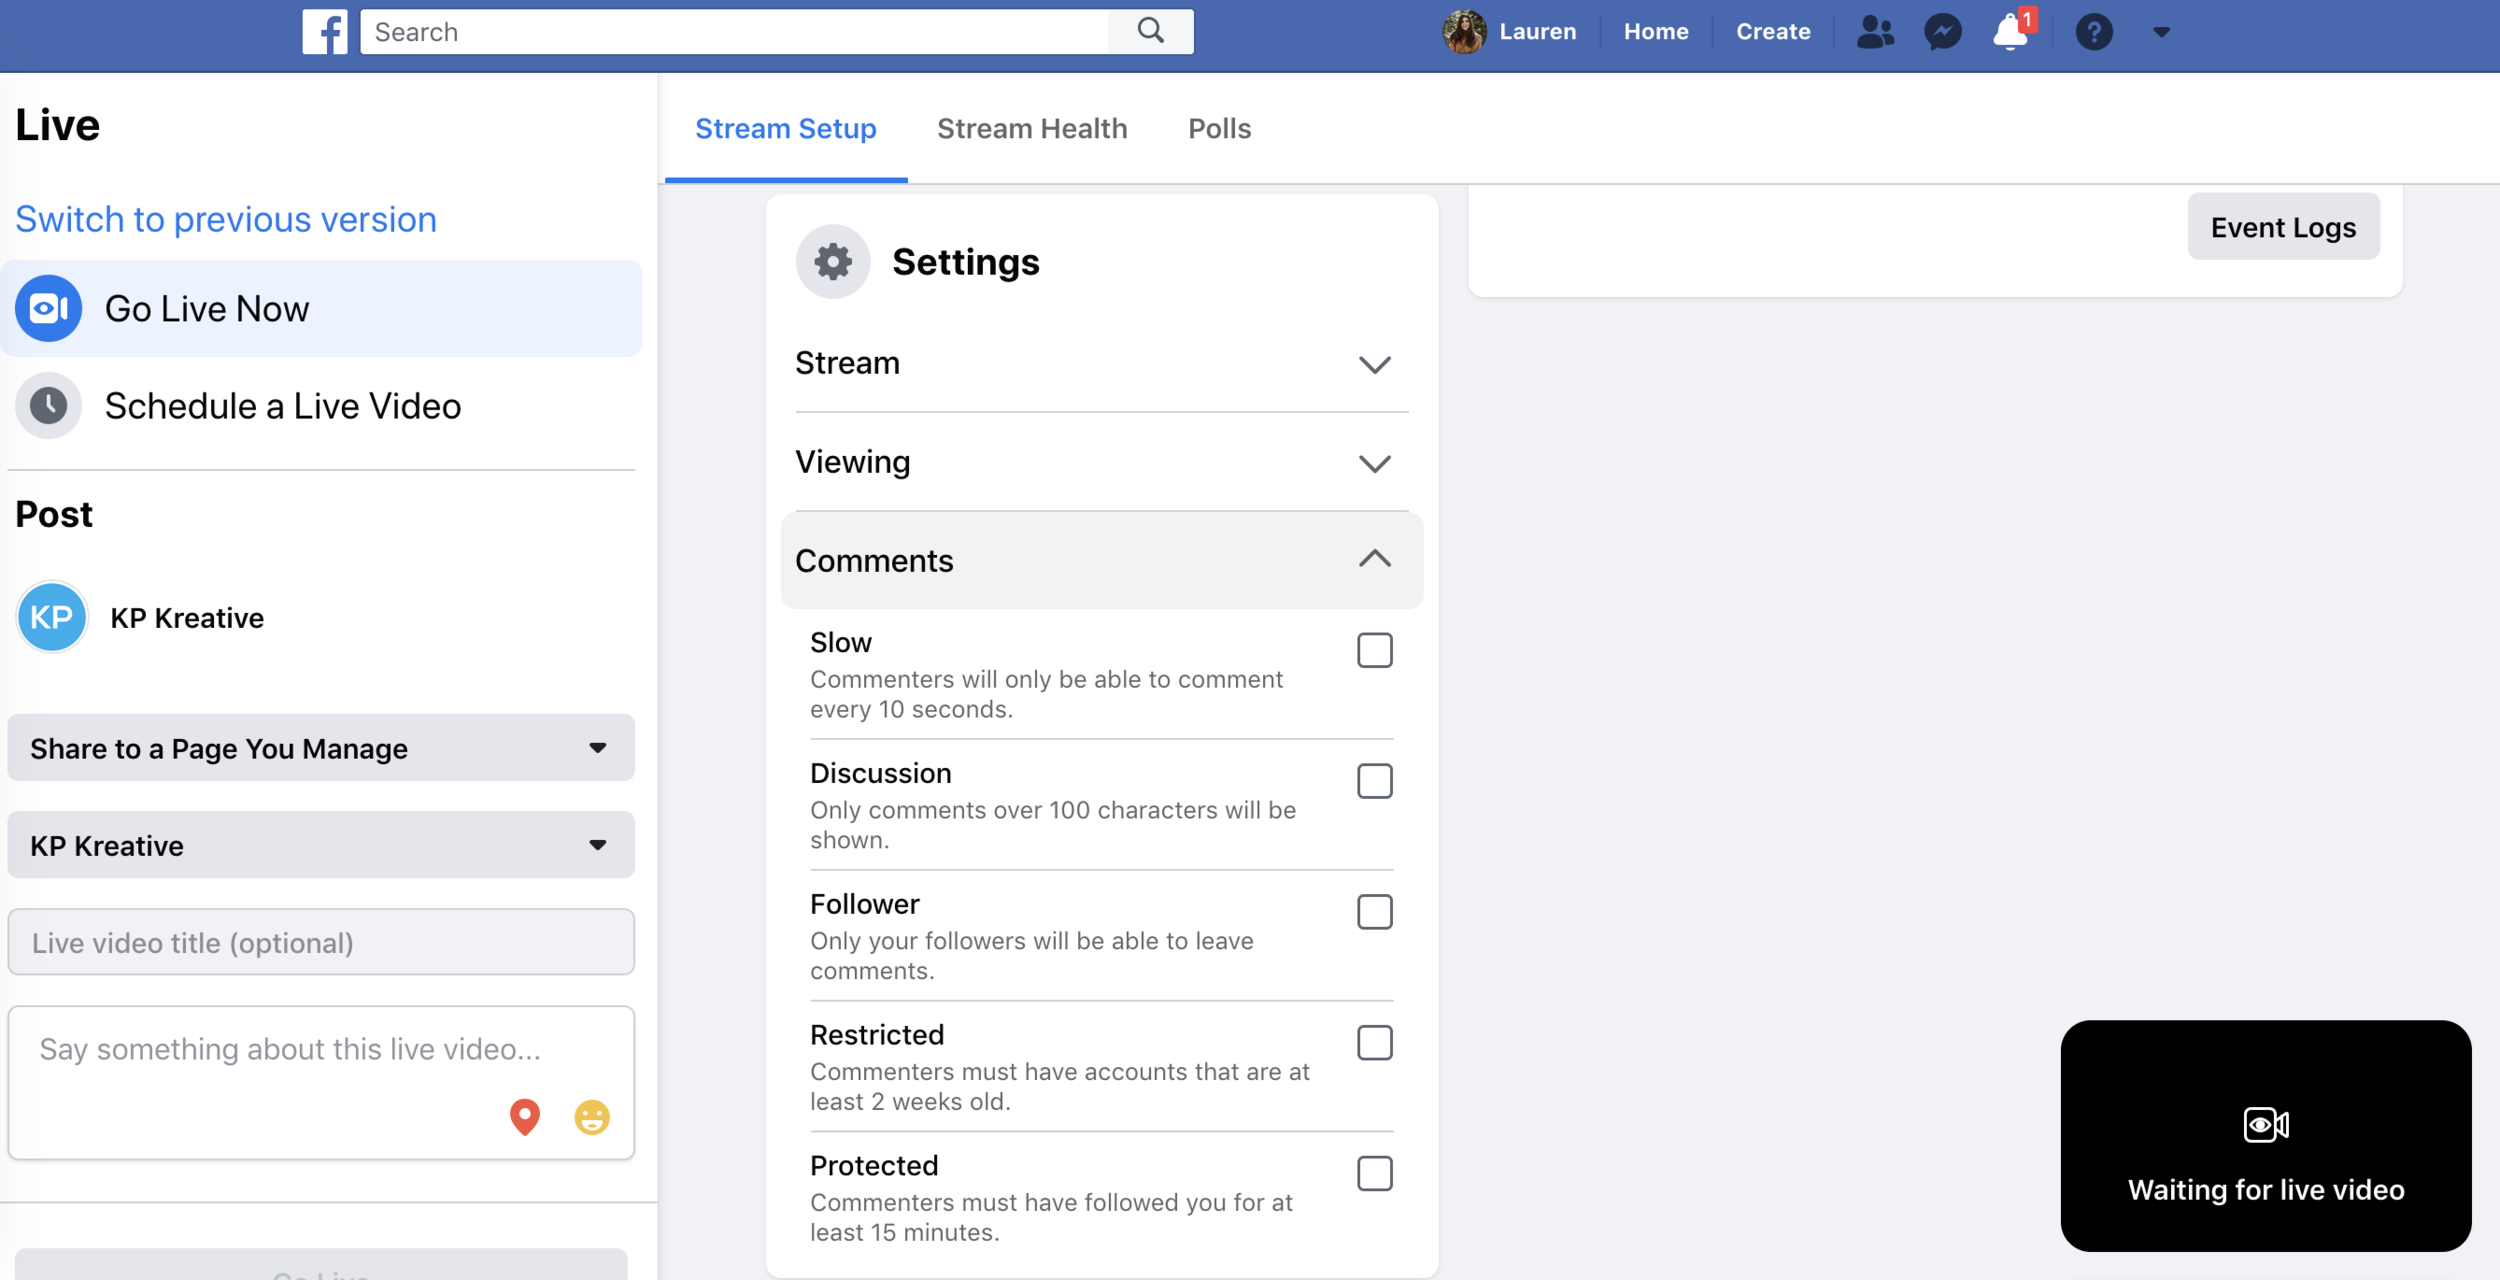
2. Now, click the drop-down menu for ‘Comments’. This section allows you to choose your specific settings for how you’d like your audience to interact with you during your Live video.
3. You can share your live video links using the ones Facebook provides as shown in the picture above. You also have the option of scheduling a Live video as shown to the left in the picture above.
4. Once you’ve completed your settings options, you are now ready to go Live.
How-To Create an Instagram Live
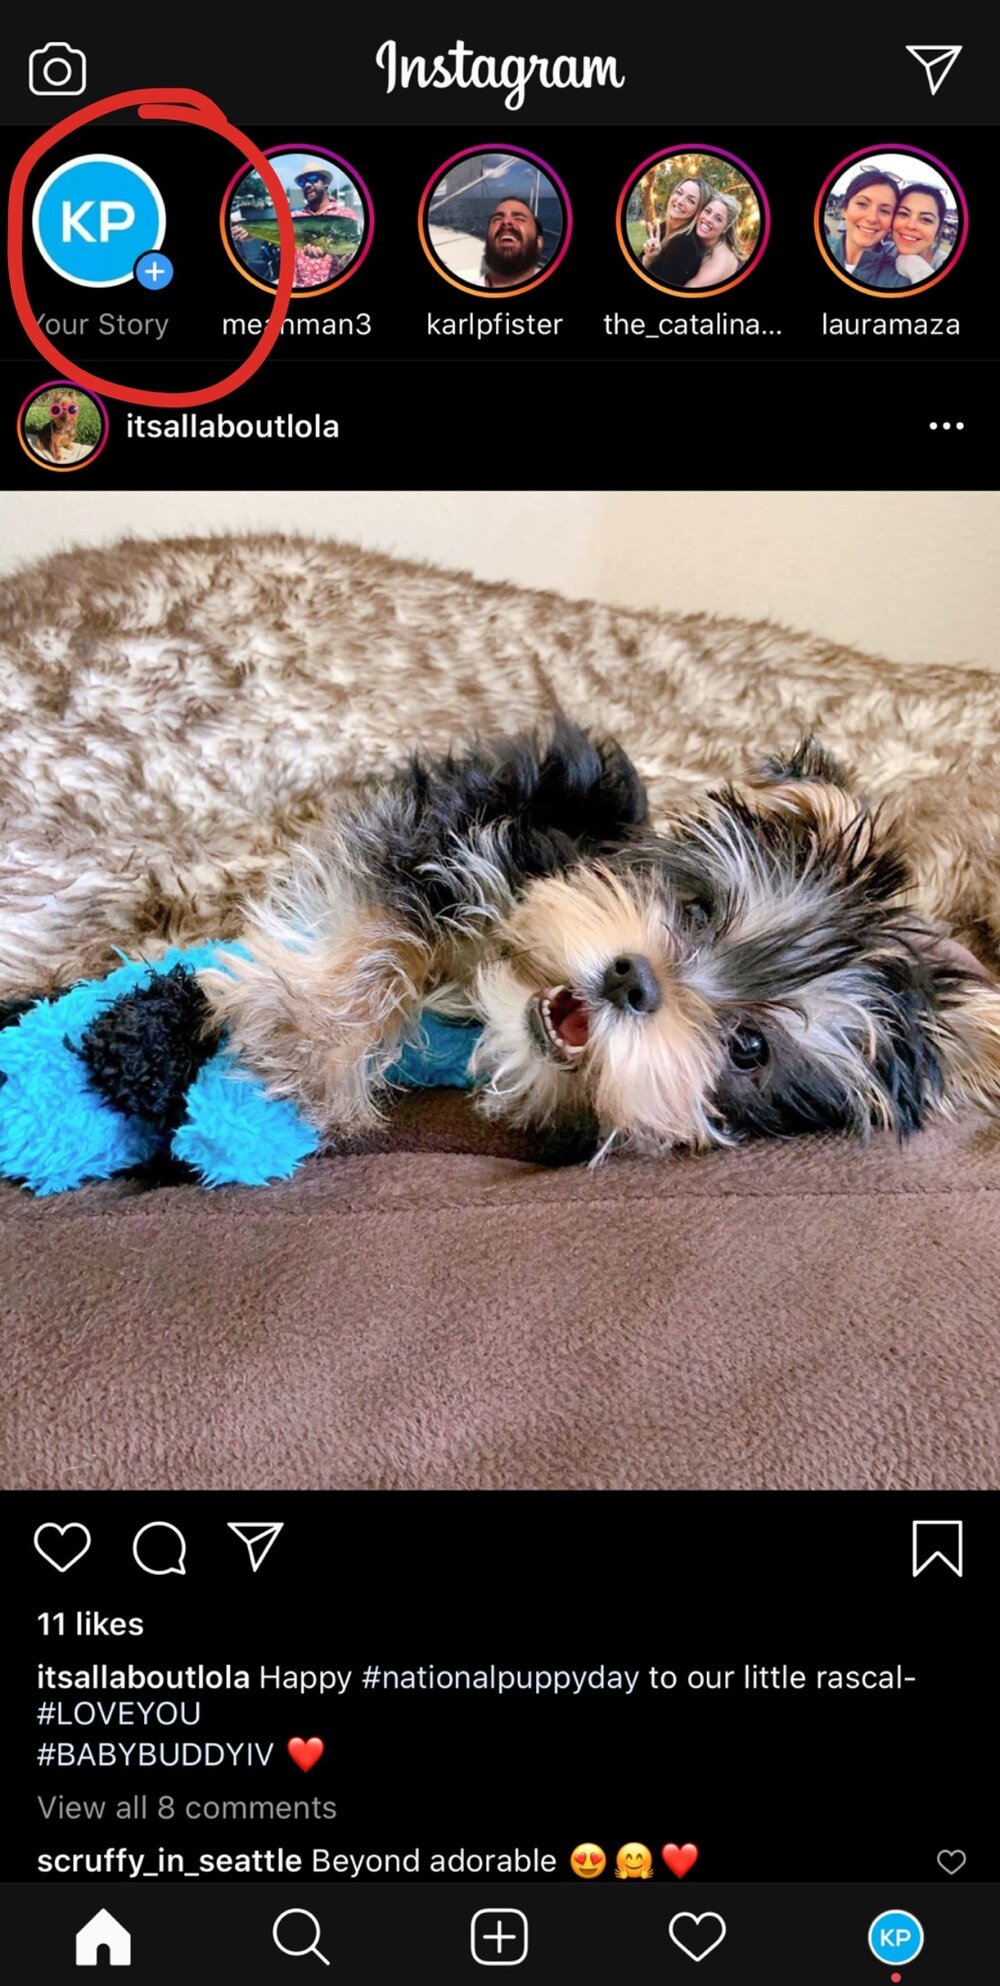
- Open the Instagram app on your phone and open your Home/Main timeline page.
- Click ‘Add Story’ in the upper left-hand corner of your screen.
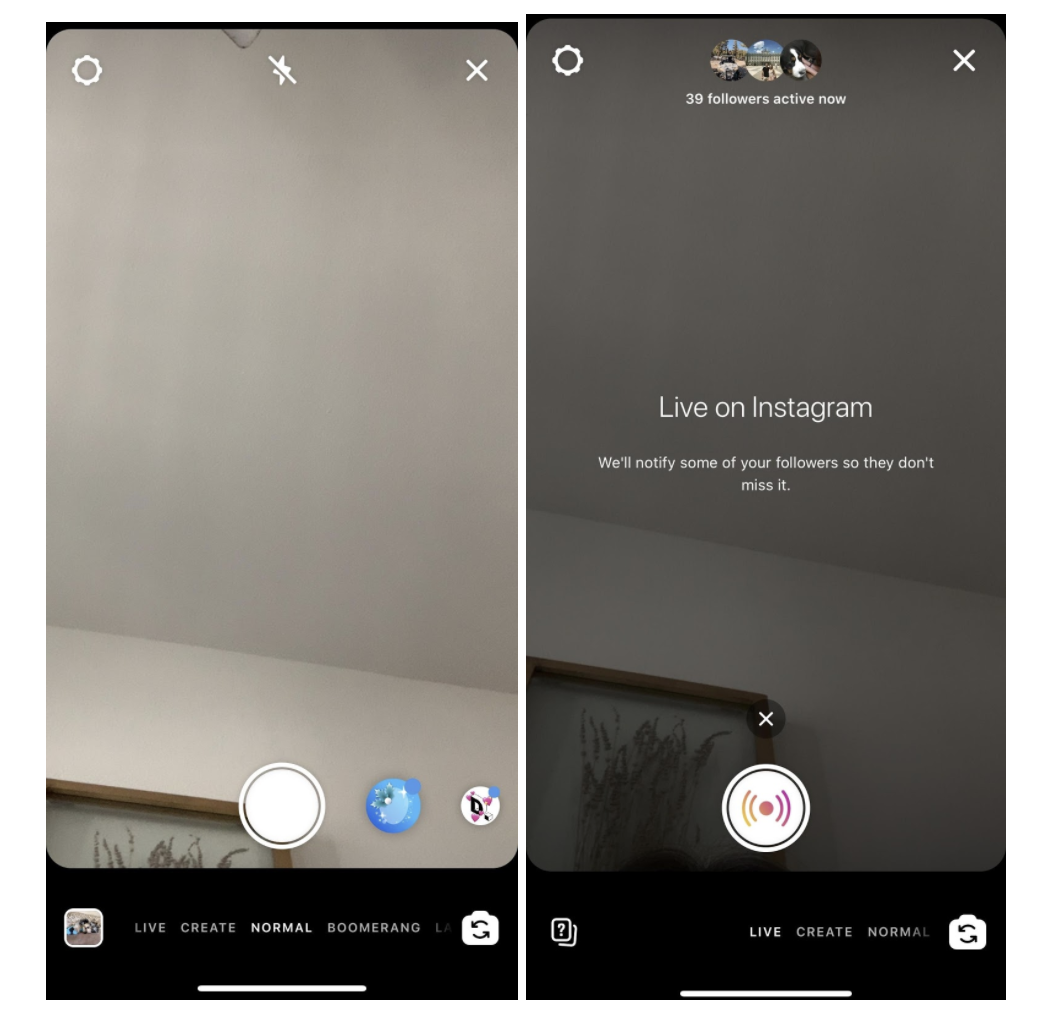
3. Once you click ‘Add Story’ the screen on the above left image will appear. On the bottom of your screen, you’ll see options such as Normal, Create, and Live. Scroll to the right and choose ‘Live’, this will take you to the screen in the above right image.
4. Now, click the Settings button in the upper left-hand corner.
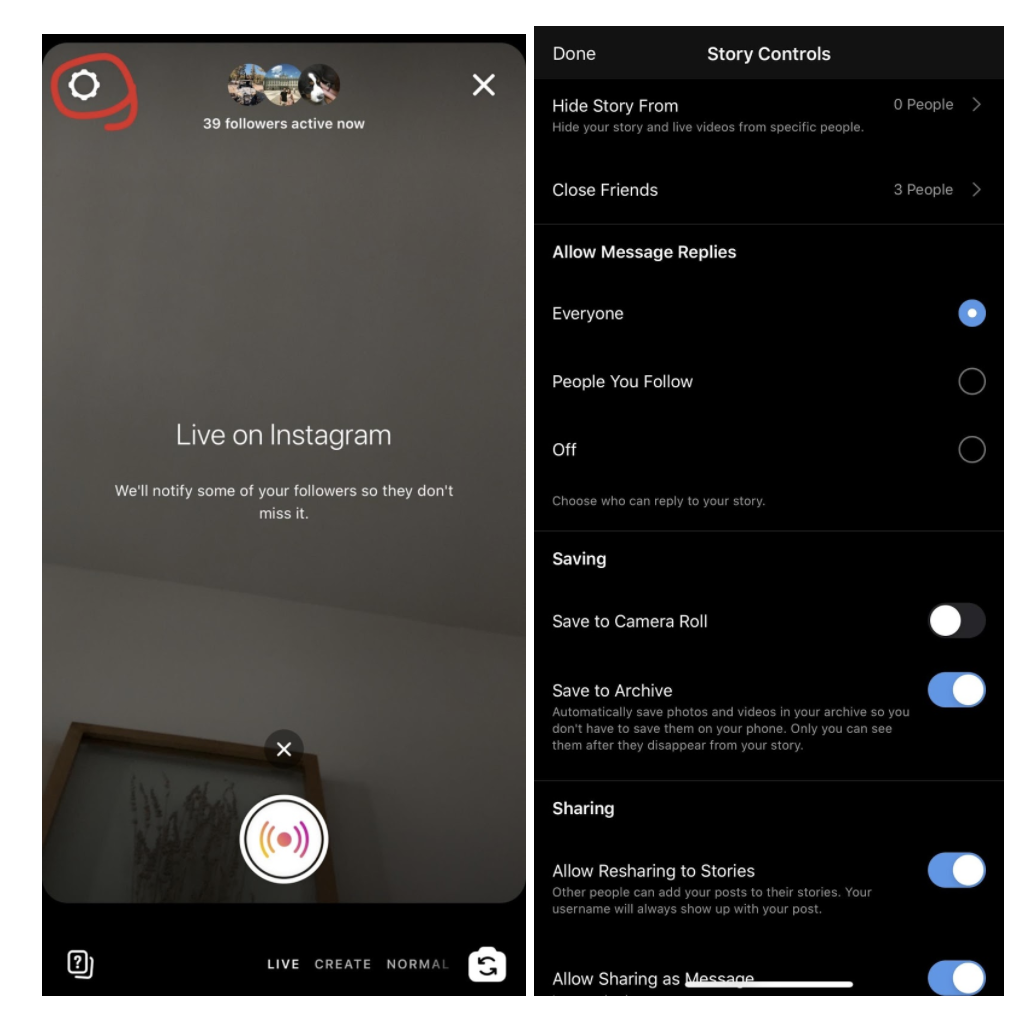
5. The Settings menu will pull up and this gives you many options for your Live.
6. You can choose who can see your Live, allow message replies/comments, and it even gives you the option of saving your Live to your camera roll in case you’d like to use it later. There are many options in this menu to help customize your Live.
7. Click ‘Done’ in the upper left-hand corner when you are finished.
8. Now, you are ready to begin your Instagram Live. Click the bottom circle ‘Live’ button when returning to the Live page to begin!
Adding Video to your Instagram Highlights
When you are done creating your video, it’s important to share it with everyone and keep it on your social media accounts! Instagram highlights are a great way to do this as any of your followers can check back in and watch your video again. Check out the video below to properly upload and create new Instagram highlights.
Tips for Your Video Marketing
Lighting is Everything
The first small step to take when prepping to record a video is choosing an area that has good lighting. Many people forget this detail and it can make a world of difference. Lighting is a great way to set yourself apart from everyone else. Refrain from having your camera face a window, otherwise you will be backlit when sitting across from it. This causes the video to look too dark. Your audience will likely become bored and lose interest since the video will seem dull due to the poor lighting. Instead, face your camera away from the window, and have your body across from it. This will allow the natural light from the window to brighten you up, and will allow your viewers to properly see your face and body.
Paying attention to these small details makes your video seem more professional.
Be aware of your environment
After you have found an area with good lighting, you want to think about your surroundings. You don’t want a distracting background, and you want to make sure you are the subject of your video. Frame yourself accordingly with your camera. Whether you are sitting down or standing up, you want to make sure your camera has enough distance from your body so you are recording from the waist up. This allows a comfortable amount of space for your audience to really see you. If it is too close, you may not have enough room for your logo or for subtitles if you will be adding those during the editing process.
Preparation and confidence
Don’t be afraid to be yourself. Your viewers’ value authenticity. Likeability is a big factor for video clicks. Speak up and make sure your message is clear. Writing a few notes and organizing your thoughts on a piece of paper is a great tool to keep your information concise and structured. If the camera makes you nervous, then practice a few times to allow yourself to relax.
Adding these tips into your routine and taking the time to think about these small details before recording, will make your videos will seem more professional and polished.


Related Posts
How to Increase Social Media Engagement
Looking to engage with your audience more? Here are some of our tips on how to increase social media engagement by using social media metrics.

How to Craft a Holiday Social Media Campaign
Learn the secrets to a memorable holiday social media campaign! Using social media analytics, you can reach your target audience with festive content.
Boosting Digital Presence During the Holidays
Boost your digital presence during the holidays with strategic seasonal content and social media marketing. Learn how to make your brand shine online.